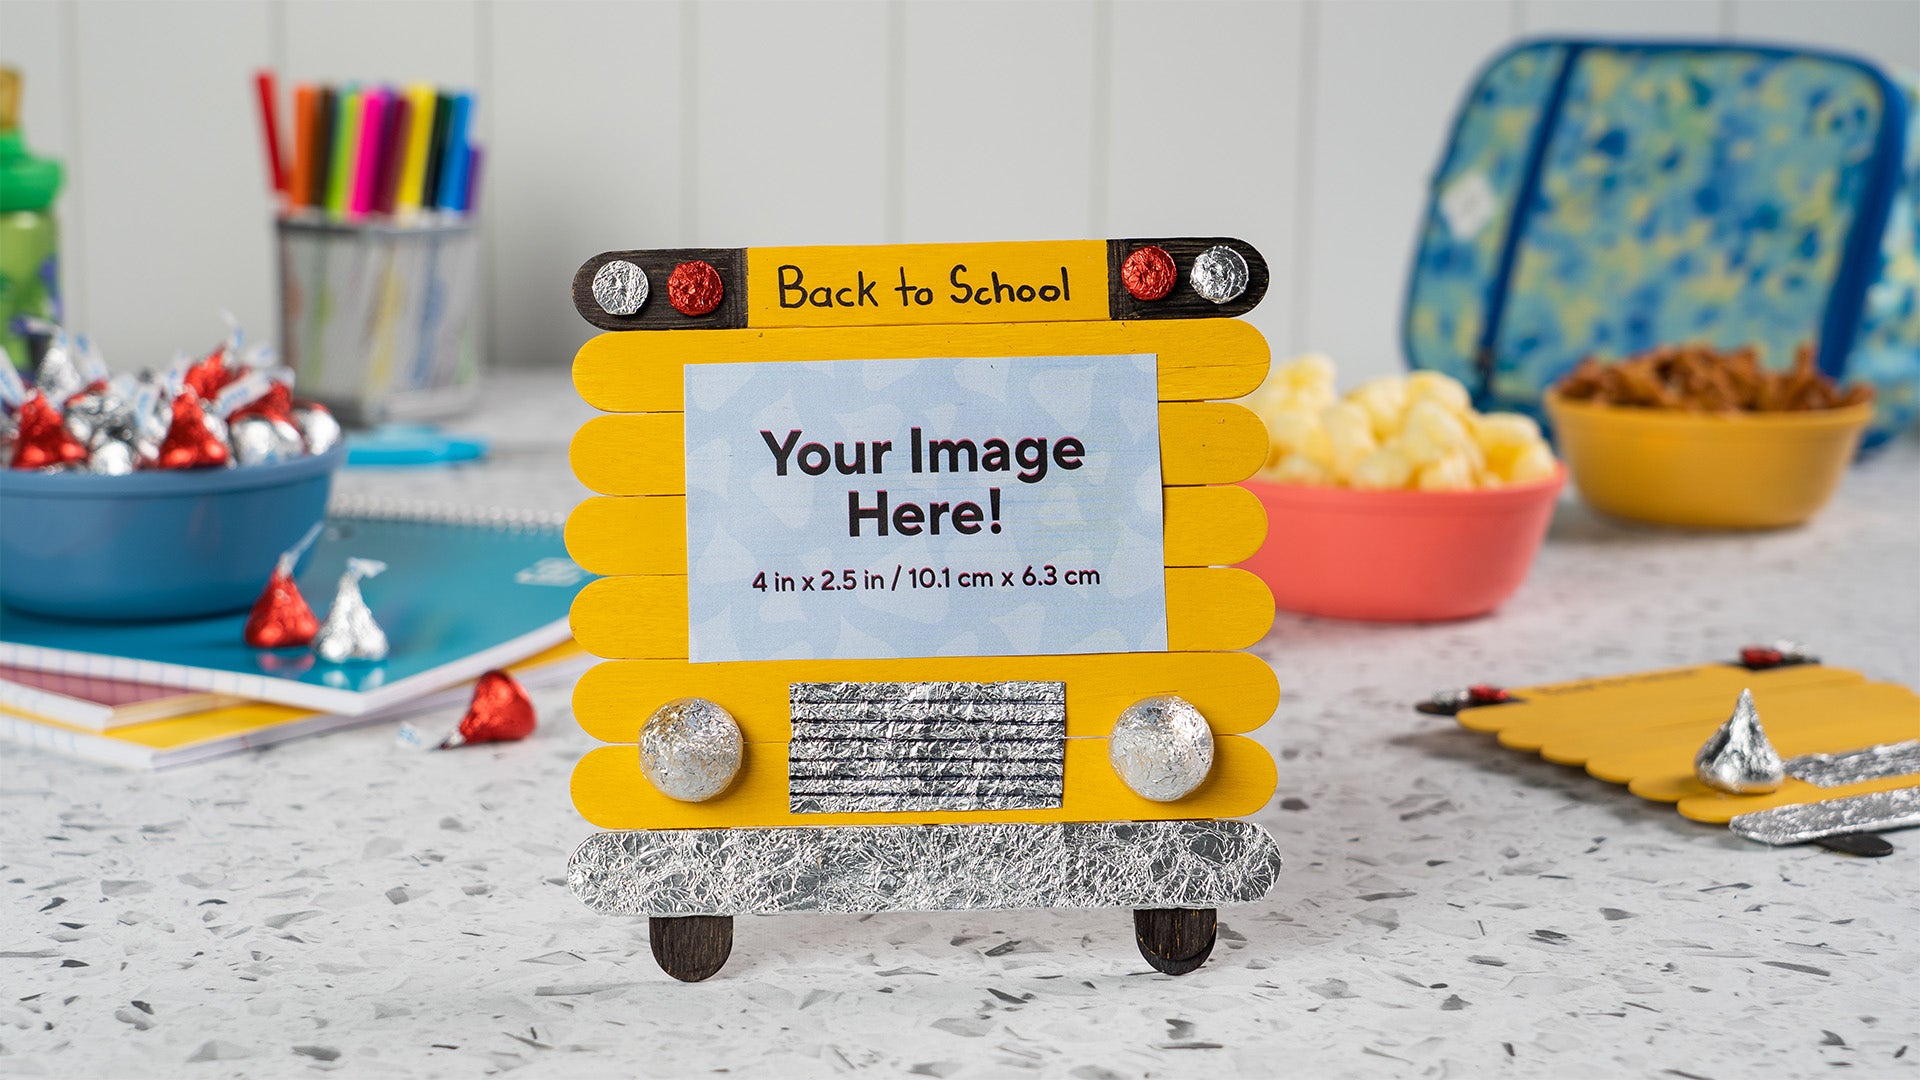
Back to School Photo Frame
Details
The start of the school year is a big moment for kids as they say goodbye to summer and hello to their new classmates and teachers. Show off their first-day smiles or yearbook photo with a sweet yet simple back-to-school picture frame made with HERSHEY’S KISSES Candies and leftover foils. Commemorate the school year by including their stats on the back, like their teacher’s name, favorite book, favorite food and what they want to be when they grow up.
You'll Need
-
10HERSHEY'S KISSES Candies (approximately)
-
10Craft sticks (approximately 5.75” to 6” long)
-
Yellow acrylic paint
-
Paintbrush
-
Black marker
-
Ruler
-
Double-sided tape
-
4Buttons
-
Hot glue gun
-
Glue dots
-
Scissors
Directions
1
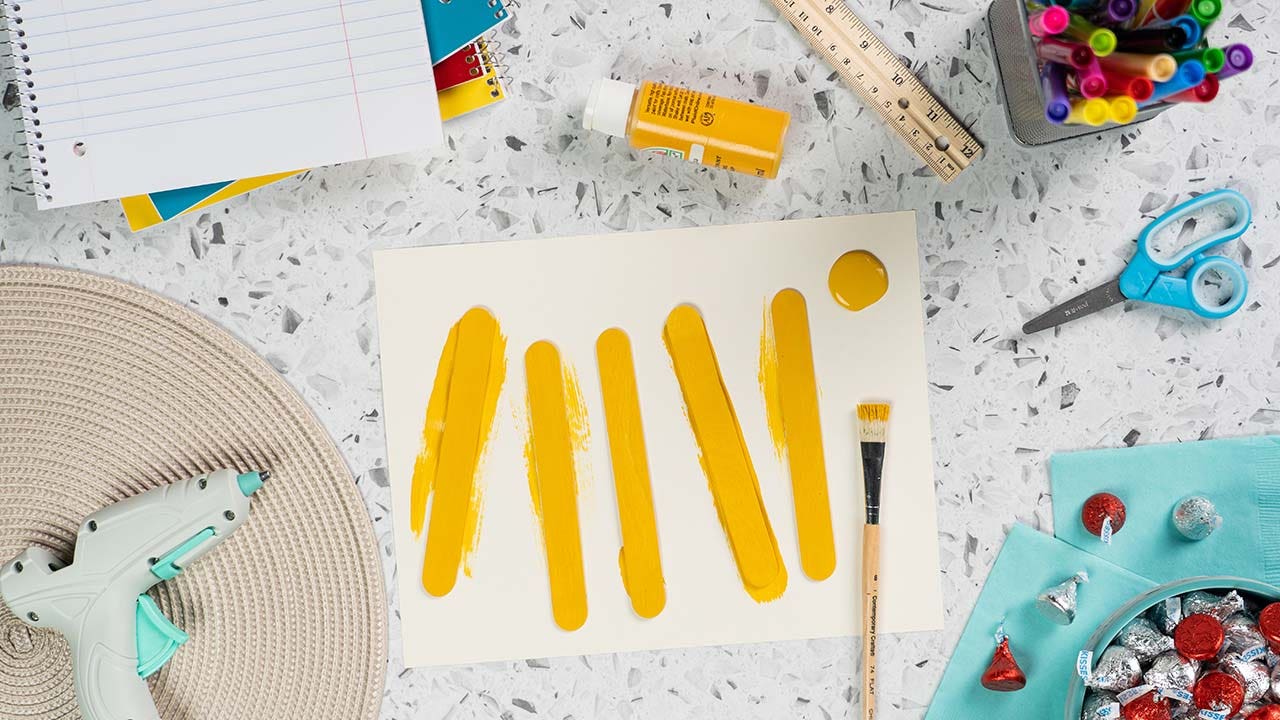
Paint 9 craft sticks (we’ll use the last one later) with yellow paint on one side and allow to dry.
2
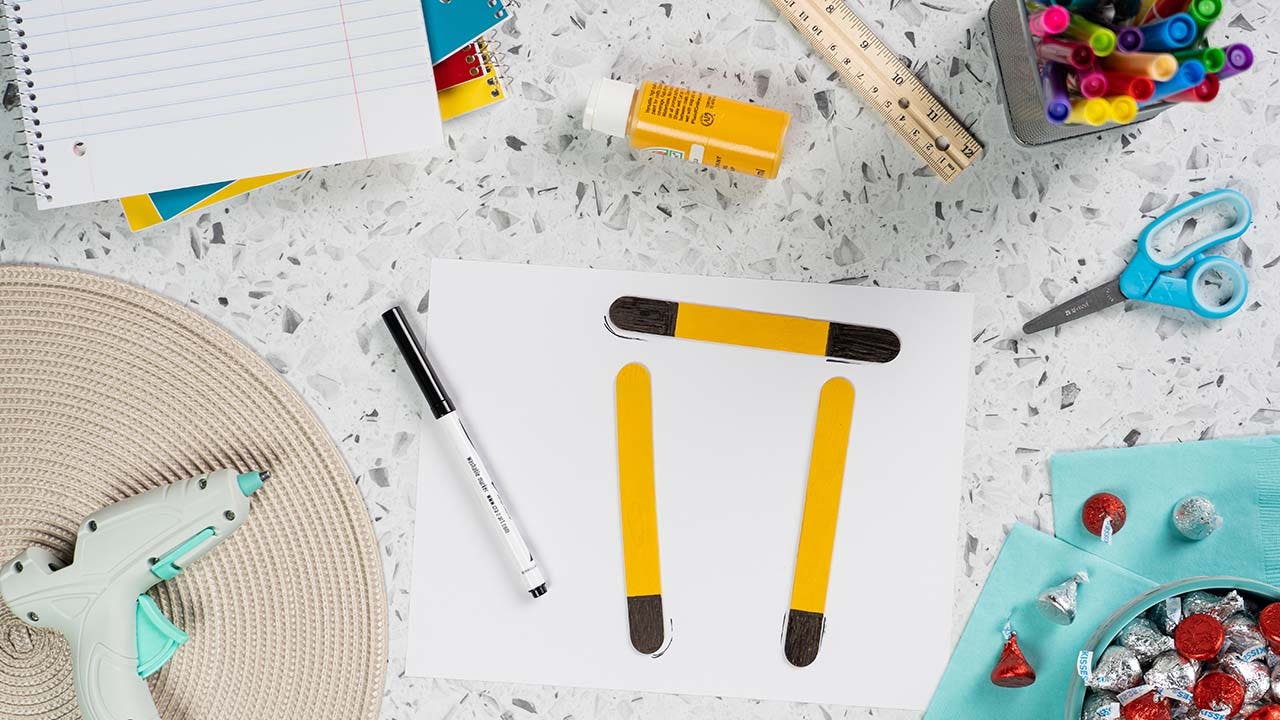
Take 1 yellow stick and draw a black line with your ruler approximately 1 inch from each end to create the top of the bus. Color in the ends with black marker. Take 2 yellow sticks and color one end of each with a black marker to make the wheels.
3
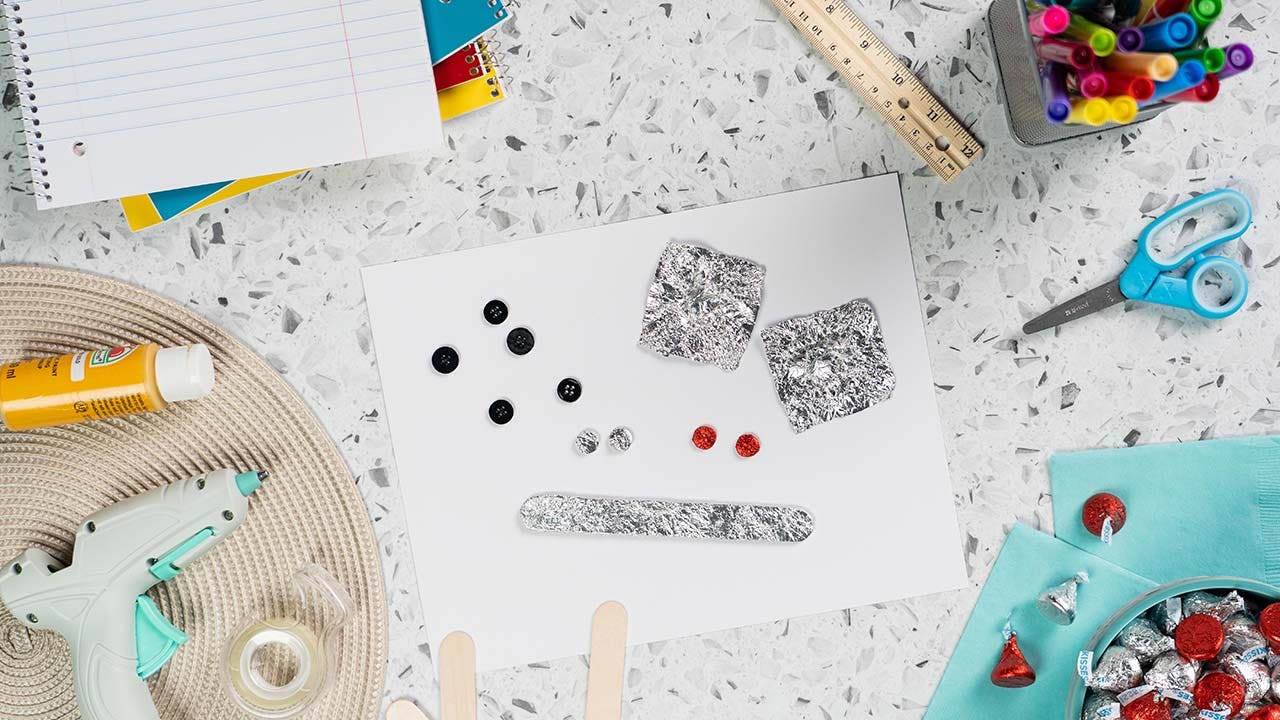
Carefully unwrap 8 HERSHEY’S KISSES Candies and smooth out the foils. Set aside the chocolate for snacking later! Wrap 2 to 3 foils around the unpainted stick, securing with some double-sided tape, to make the front bumper. Wrap 1 foil around each of the 4 buttons to make the lights.
4
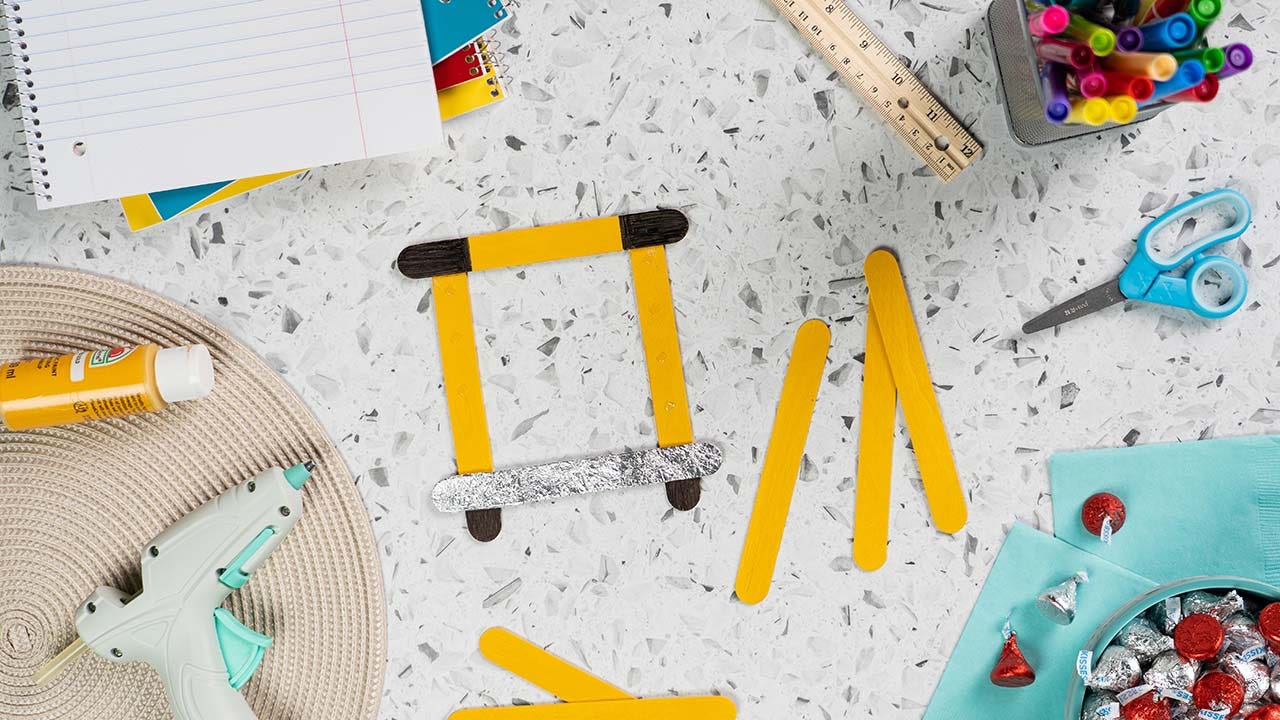
Glue the bumper and the top of the bus sticks to the wheel sticks to create the frame’s structure.
5
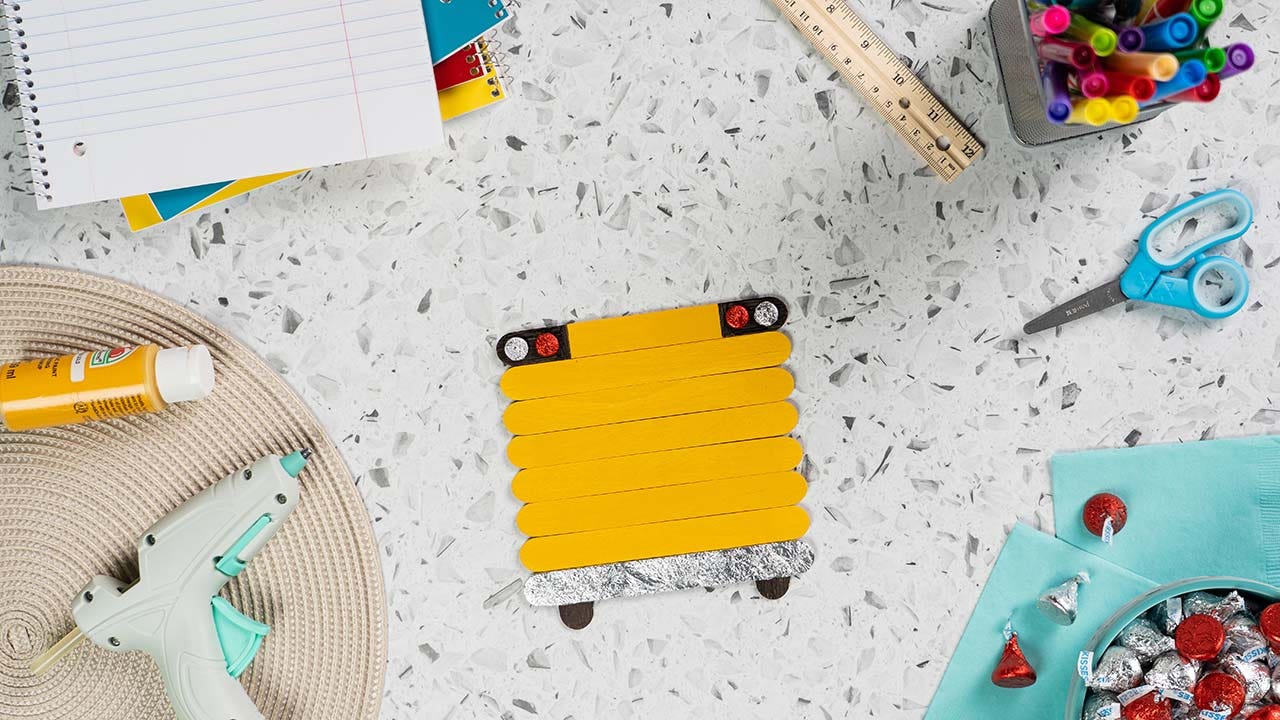
Secure the rest of the yellow sticks with glue. Add the 4 lights using glue dots.
6
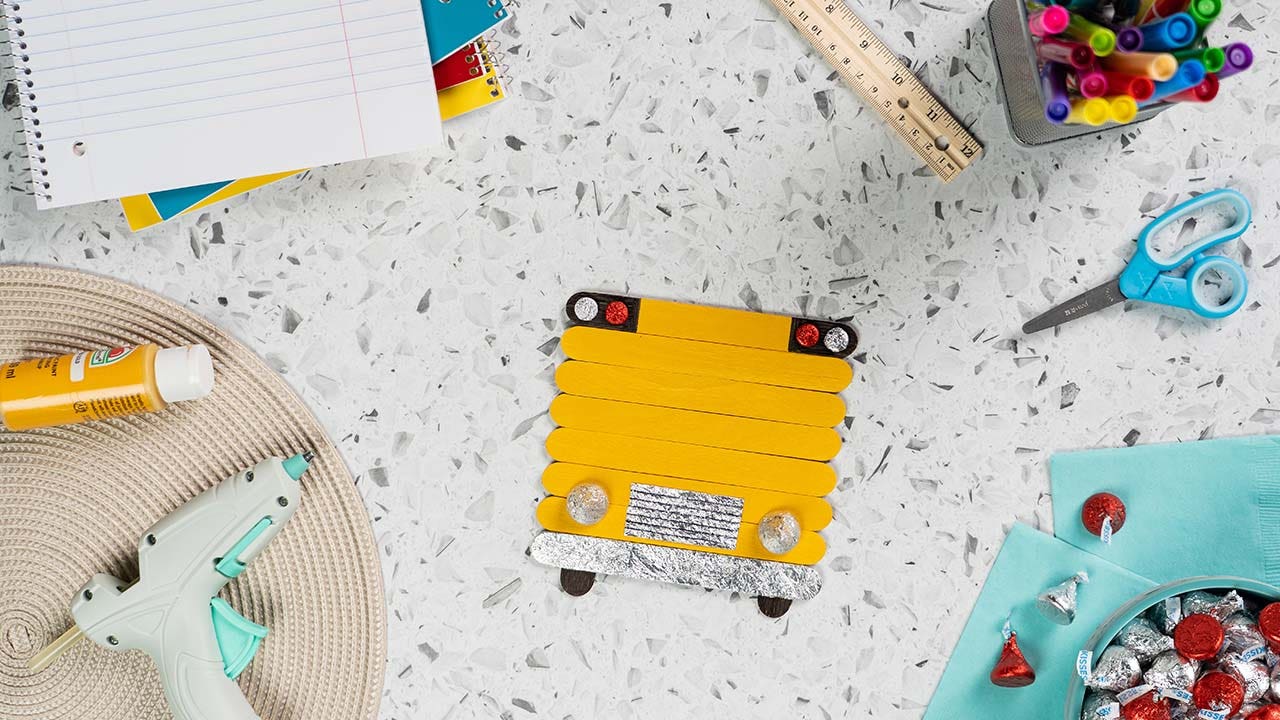
Remove the plumes from 2 HERSHEY’S KISSES Candies and re-wrap the foil around the chocolate. Secure to the bus with hot glue. Cut one foil square into a rectangle and add the grill using double-sided tape, then add a few thin lines with your black marker.
7
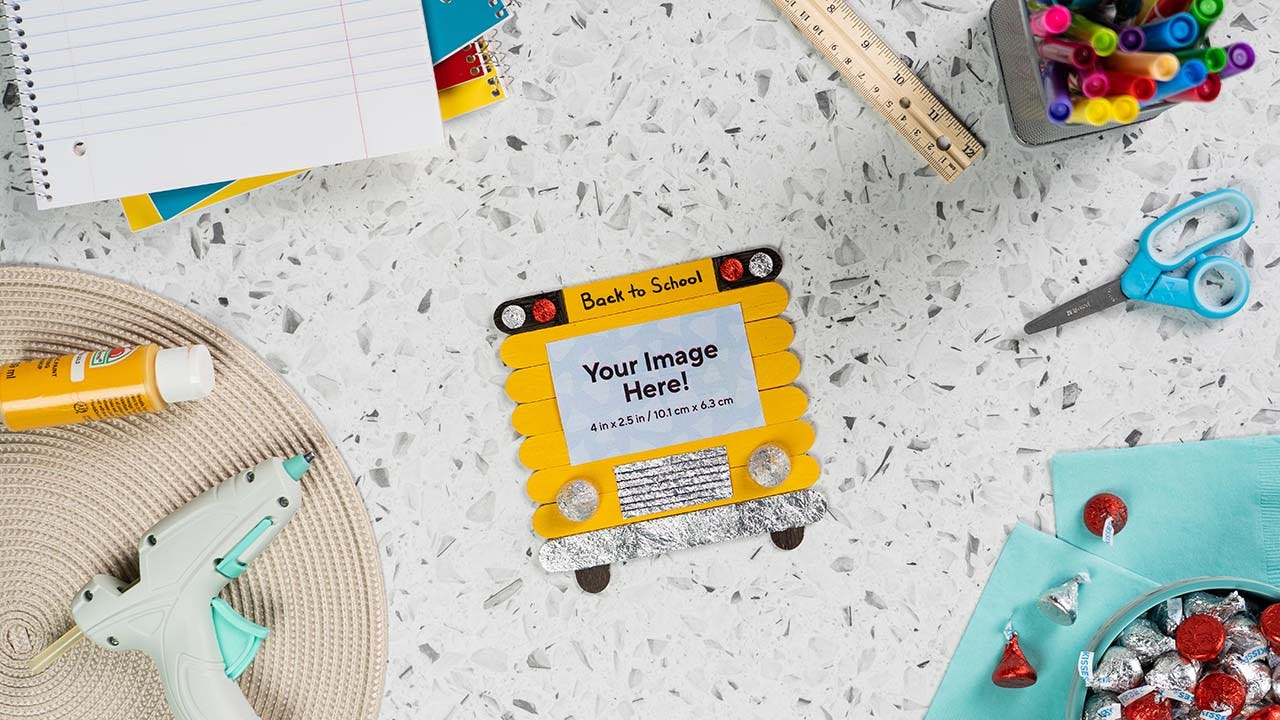
Personalize your frame with your child’s photo and a message at the top. You can add your child’s name, school name or school year. If you have two children, you can use two wallet-size photos for a double dose of back-to-school fun!
Ideas & Inspirations
Add magnetic strips to put on the fridge, secure a string or wall hook for hanging, or add a cardboard stand for a table display. Customize your headlights using ROLO® Candies or REESE’S Peanut Butter Cup Miniatures!
