KISSES Cake Pops
Details
- Timing
- Timing
- Total:
- Prep:
- 1 Hr. 10 Min.
- Skill Level:
- Expert
- Yields:
- 24 cake pops
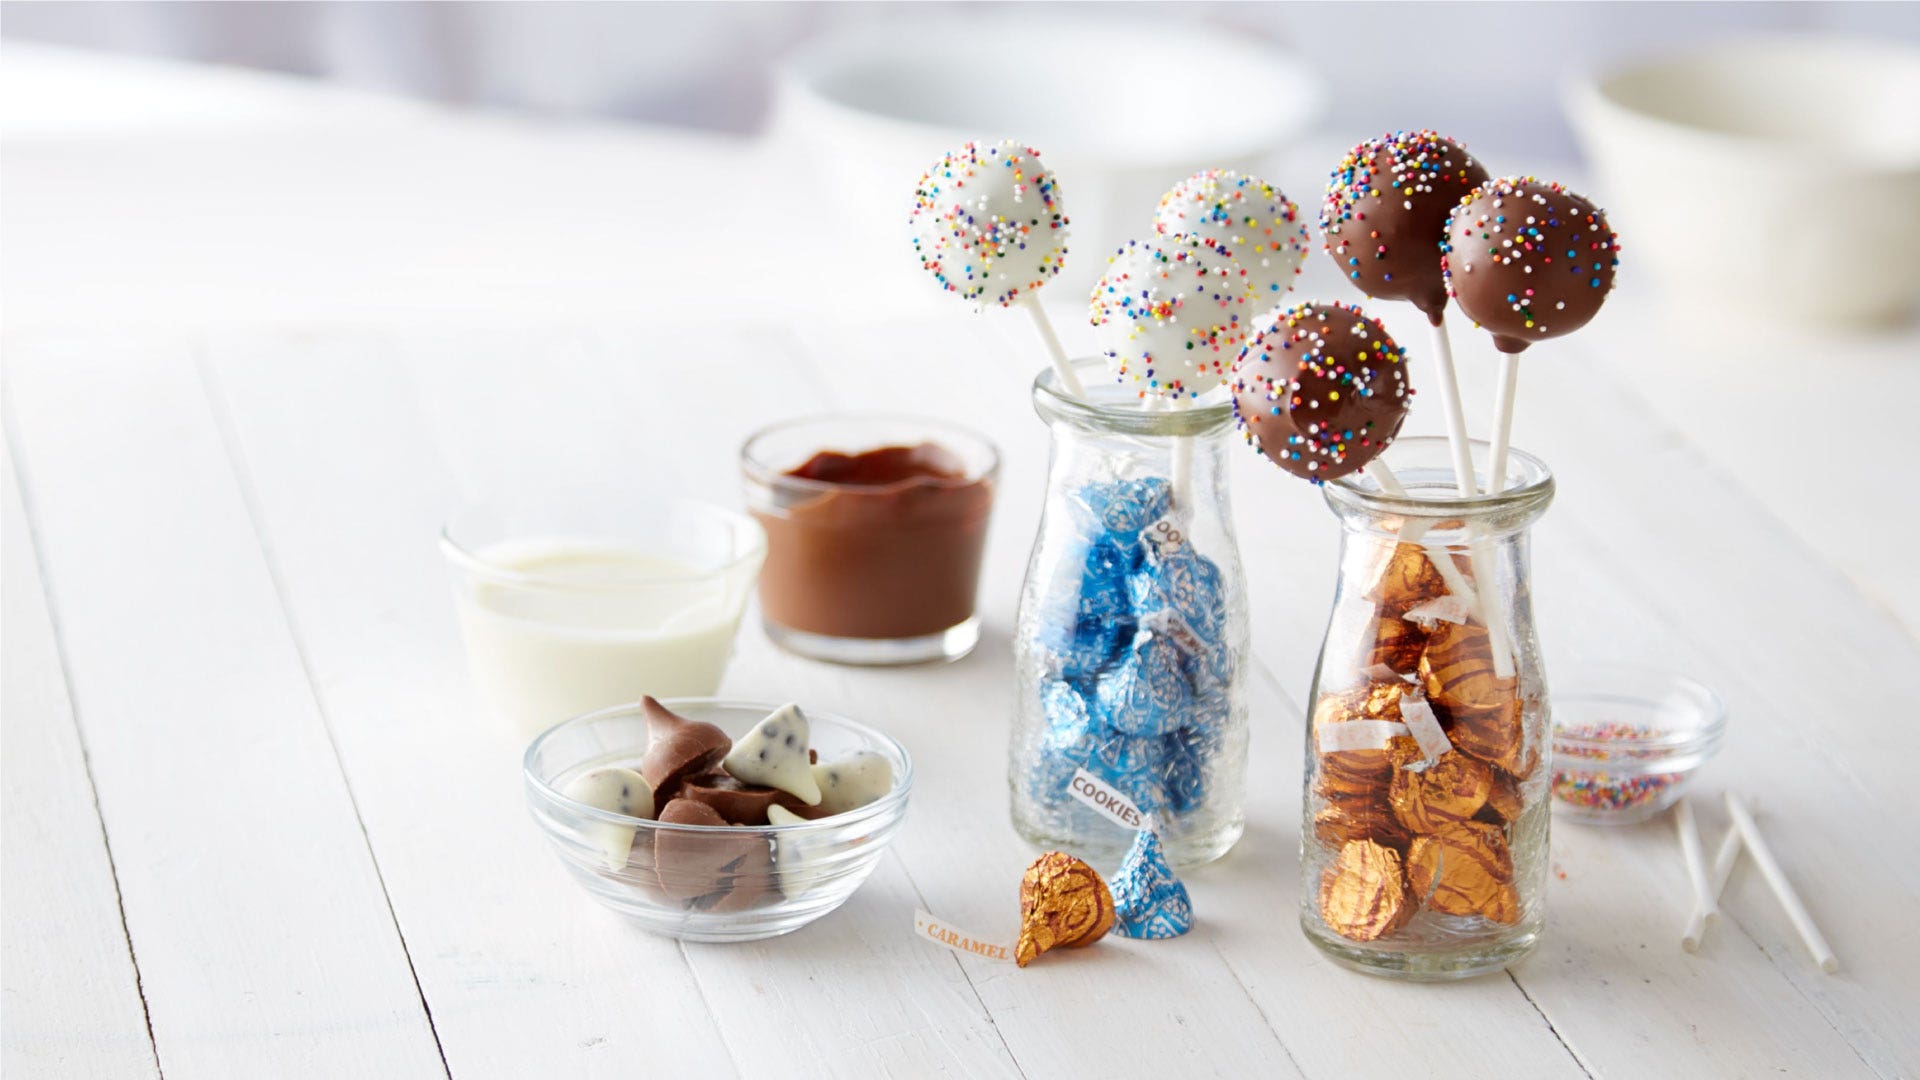
What’s better than a cake pop? A cake pop with everyone’s favorite HERSHEY'S KISSES Chocolate Candy in the middle! This HERSHEY’S KISSES Cake Pops recipe will show you how to make these impressive treats that are fit for any party. We recommend showing off these colorful HERSHEY'S KISSES Cake Pops as a centerpiece for a party, dessert buffet or any special occasion. Try displaying them in a small vase, jar or painted styrofoam — they look just like an edible bouquet. Want more cake pop flavors for your stunning cake pop display? Check out these Chocolate Brownie Pops for more bite-sized goodies.
Ingredients & Directions
- Prep Time
- 1 hour 10 minutes
- Chill Time
- 3 hours 30 minutes
BAKE MODE:
Prevent your screen from going dark while you bake.
Ingredients
-
24HERSHEY'S KISSES Brand Milk Chocolates filled with Caramel or HERSHEY'S KISSES Brand Cookies 'N Creme Candies
-
24lollipop sticks
-
2 cupsHERSHEY'S Milk Chocolate Chips (11.5 oz pkg.), divided
-
2 cupsHERSHEY'S Premier White Creme Chips (12 oz pkg.), divided
-
styrofoam block
-
granulated sugar
-
1/2baked and cooled chocolate 13x9x2-inch cake*
-
1 cupchocolate frosting (ready-to-spread or homemade)
-
1 Tbspshortening (do NOT use butter, margarine, spread or oil)
-
colored nonpareils
READY TO MAKE THIS?
Directions
Equipment Needed
1
Remove wrappers from chocolates. Using point of small paring knife "drill" small hole (about 1/4 inch deep) into bottom each chocolate piece; set aside. Fill small bowl with granulated sugar.
2
Place 1 tablespoon chocolate chips (for caramel filled chocolates) or white creme chips (for cookies 'n crème candies) in small microwave-safe bowl. Microwave at medium (50%) for 15 seconds; stir. If necessary, microwave at medium an additional 10 seconds at a time, stirring after each heating, until chips are melted and smooth when stirred. One at a time, dip about 1/4 inch of the tip of a lollipop stick into melted chocolate and insert into hole in bottom of chocolate piece. Place pointed end of chocolate piece into sugar; straighten so that piece is upright with stick pointing straight up. While chocolate is very soft readjust stick so that it is straight. (You will probably need to straighten the stick several times before the chocolate hardens enough to hold the position and it is best to only work with a few at a time). Once stick is firmly in position insert into foam block.
Tip
Place container with melted chocolate in bowl filled with about 1 inch warm water to help keep the chocolate fluid longer. Be careful not to allow any water to get into the chocolate mixture.
3
Crumble cake into medium bowl; add just enough frosting so that the cake crumbs stick together and the mixture is moldable. For each pop scoop out a level tablespoon mixture and roll into ball. Flatten ball slightly; shape around chocolate piece on stick so that the piece is covered and forms ball on top of the stick. Insert stick back into foam piece. Cover; refrigerate 2 to 3 hours or until ready to dip. (The amount of cake mixture will vary depending on cake recipe used. Any extra cake mixture can be used to make additional pops or cake balls).
4
Place remaining milk chocolate chips, white creme chips and shortening in deep microwave-safe bowl (such as large glass measuring cup). Microwave at medium for 1 minute; stir. If necessary, microwave at medium an additional 15 seconds at a time, stirring after each heating, until chips are melted and smooth when stirred.
5
Dip cake pop into melted chocolate mixture; gently tap off excess coating. Immediately add sprinkles; insert coated pop back into foam block. Repeat until all pops are coated. (If coating mixture cools and coating becomes difficult, microwave at medium 10 to 15 seconds; stir). Use leftover coating for dipping pretzel rods or other snacks. Store pops in cool, dry place. Use pops within two weeks.
Tip
Cake can be from a mix or your favorite recipe. Save the other half for another use.
If you don't have a foam block fill bowl with about 3 inches granulated sugar. Insert sticks into sugar.
For best results use the smallest nonpareils. Heavier sprinkles or candies will drag melted chocolate off the cake ball.
-
Nutrition FactsServings Per Container 24 servingsServing size 1 cake pop (75g)Amount per servingCalories340% Daily Value*Total Fat 19g 24%Saturated Fat 12g 60%Trans Fat 0gCholesterol 15mg 5%Sodium 115mg 5%Total Carbohydrates 42g 15%Dietary Fiber 1g 4%Total Sugars 37gIncludes 23g Added Sugar 46%Protein 4gVitamin D 0 0%Calcium 94mg 8%Iron 2mg 10%Potassium 197mg 4%
*The % Daily Value tells you how much a nutrient in a serving of food contributes to a daily diet 2,000 calories a day is used for general nutritional advice.
